Keep reading to see how I made this dancing puppet
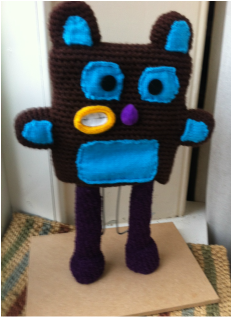
| First, I had an idea for a mechanism and so to try it out quickly I did a quick mock up of Lego to see if it worked like I thought it would. Initially I braced the centre pivot point further up on the side legs, but this made the whole structure too rigid to work. (This will be important later) I also had an idea for a brown bear. mostly because I had some brown wool to use. I don't generally like brown so I had to make a concerted effort to think of somewhere to use it... so I thought a Brown Bear would be good. Then I started knitting and crocheting. I soon ran out of my brown wool and so had to modify the brown bear to a brown dancing puppet with longer legs. In this sketch I also played with adding a bow tie. I finished knitting (the blue bits) and crocheting (everything else) and layed out all the bits to see how they would fit together. The mouth (yellow) I made with French knitting and the eyes and nose are sticky felt circles that you get to put underneath chair legs to stop them scratching laminate flooring. I like to use these as they are perfect circles which are difficult to make by hand. Another reason I like them is that they have got a sticky back which isn't good enough to stick them on permanently but is fine for knowing where the eyes are whilst building. At the same time as knitting and crocheting I was also building the frame for the puppet. I made an upsidedown U shape so that the puppet could sit on the top horizontal bar. I cut two square holes in a sheet of MDF and the legs fit snugly into these holes - How did I cut square holes? I drilled a round hole and then filed a lot with a tiny file. This close up of the mechanism shows how I got around the rigidity issue. I knew the pivot points of the arms would have to move side to side to get past the turning point (see videos on youtube to see what I'm talking about) To do this I made second shorter legs which sit behind the main legs. These are attached to the front legs by springs which have been glued into drilled holes in each leg. This means that the pivot points of the arms have the ability to ease out to the sides when required. I got these pegs form the pound shop and used the springs from them. For the pivot points I drilled holes and used long nails which I bent over so they didn't slip out. This is not ideal, but I don't have a workshop or anywhere I could shape a rivet or the likes. I tried to bend the nails so that the pointy end went back into the wood, which only worked sometimes. I added picture hooks and looped wire through the hooks to push and pull the mechanism. I need to try and change the wires for stronger wire that doesn't bend when pushing the mechnisam upwards. I added the legs on by taking the frame out of the base plate and putting the crocheted legs over the frame legs then placing the frame back into the baseplate. I put the body on over the frame and put the arms over the arms. At this point I still haven't attached the fabric legs or arms to the body. I still had to fiddle a bit with the length of the frame arms and legs to get it just right. At this point I had made a large hole in the crocheted body and pushed the frame arms through. I tried it like this but I wasn't happy with the movement in the fabric body. (see you tube video) So I decided that I needed a slot hole for each arm in the crocheted fabric. This is much easier to do when you are actually crocheting the fabric from the start. I made a little test piece to try out a process new to me called steeking. This yellow test piece has a thin rectangular line of cotton sewn with a sewing machine. I used a stitch which gave me three line of cotton per stitch. I then cut the wool up the middle of the rectangle, creating a slot hole. In this photo you can see the rectangular sewing machine line I made in the puppet fabric. And then I cut up the middle of the rectangle. The sewing machine rectangle saves the rest of the wool from unravelling when it is cut. I did this on both sides of the puppet. I added teeth as per my original design. I also decided to make the nose more prominent so I used a purple pom pom instead of the black felt circle which wasn't really visible against the dark brown body. Lastly I changed out the wire controls for a stronger wire as I felt they were too flimsy, especially for pushing the mechanism upwards. | 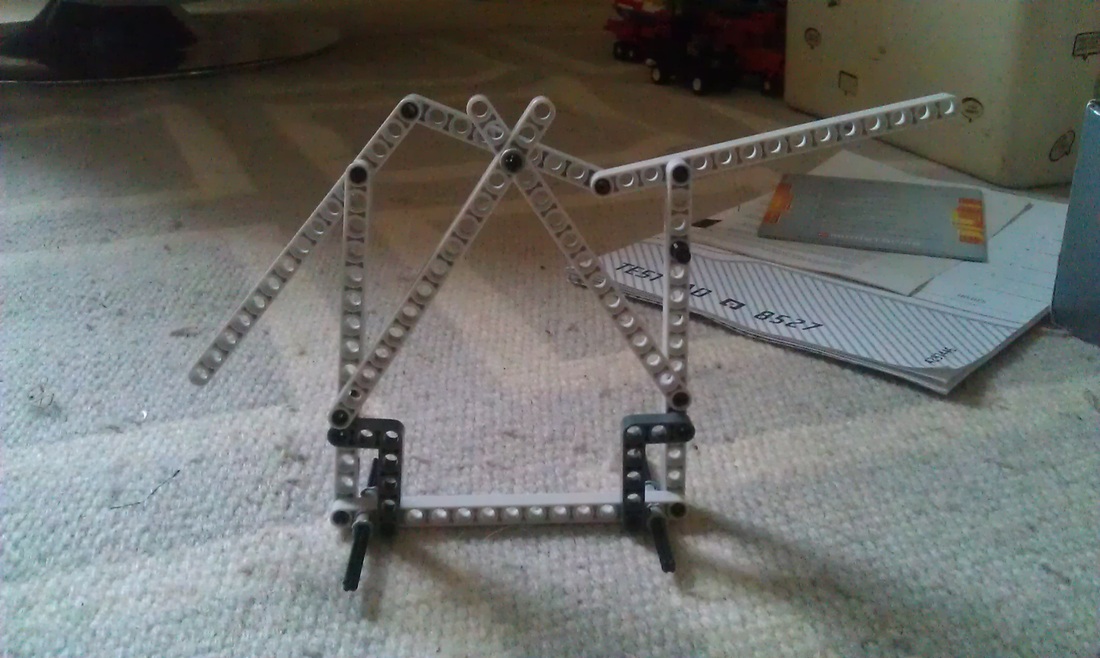 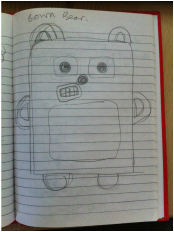 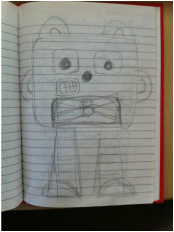 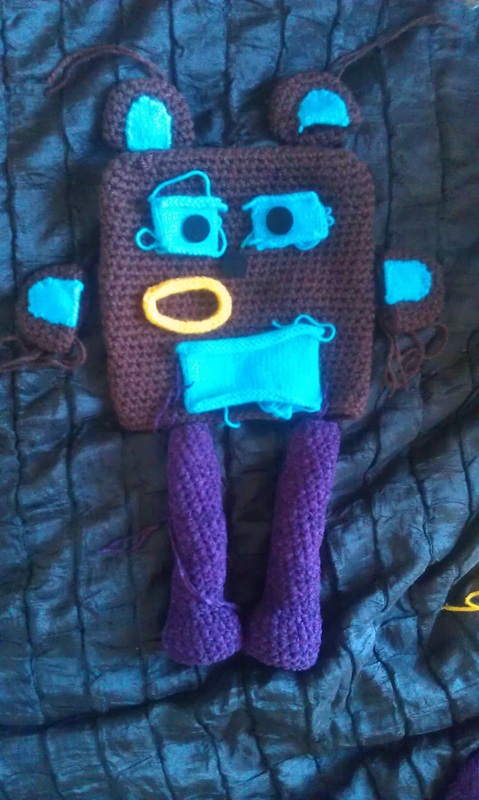 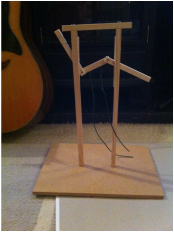 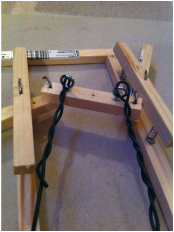 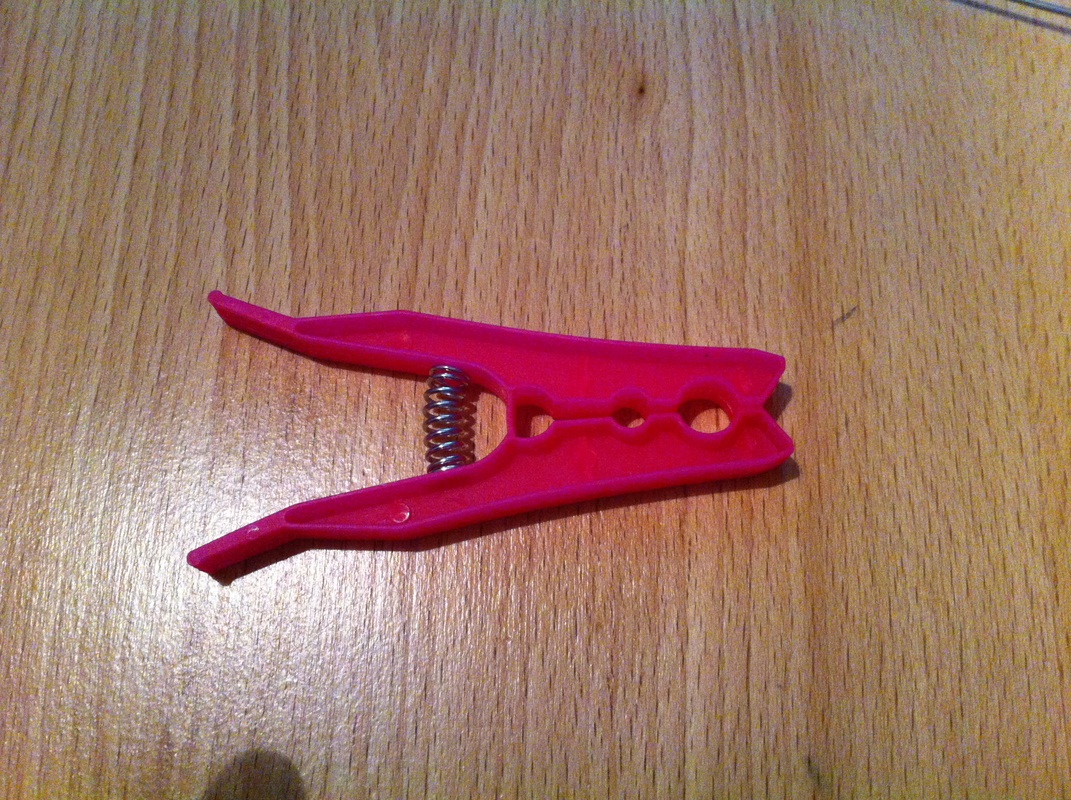 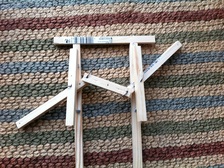 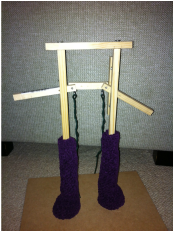 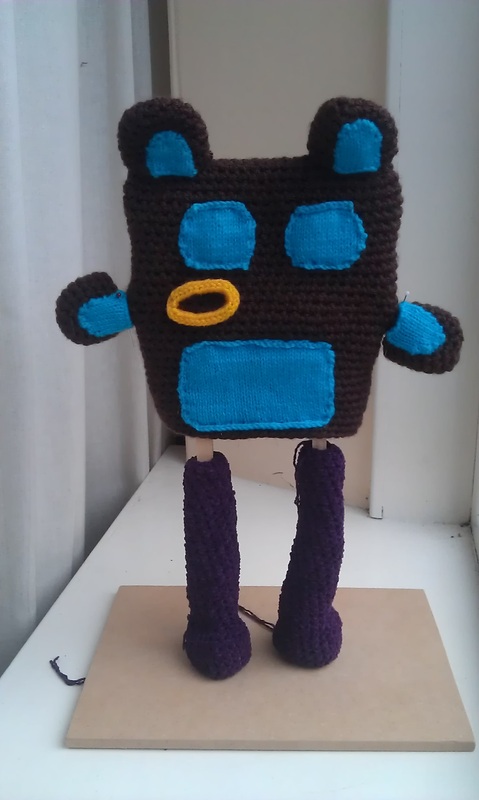 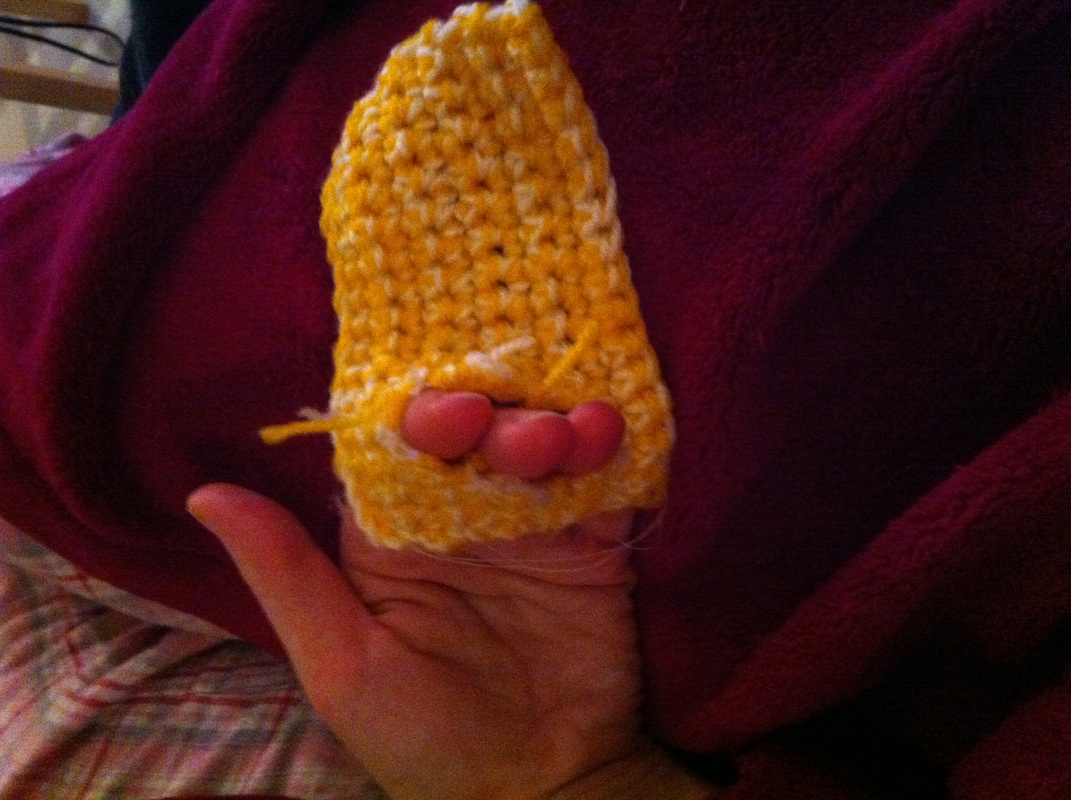 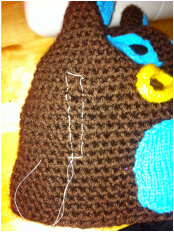 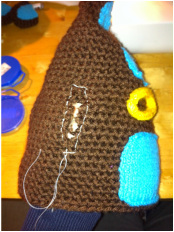 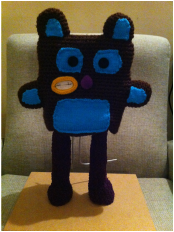 |
